Have some empty plastic water bottles in your recycling bin? That’s wonderful. Did you know that you can also reuse and repurpose those containers for multiple purposes? From creating a piggy bank to a bird feeder, unleash your creativity at home via the following do-it-yourself (DIY) crafts with plastic water bottles that only require a handful of supplies. Perfect for adults and kids alike, these easy and fun projects promote stress relief and relaxation while uplifting your mood and encouraging valuable bonding time. Now get off that phone and transform your extra plastic water bottles!
Handy DIY Crafts with Plastic Water Bottles You’ll Enjoy Making
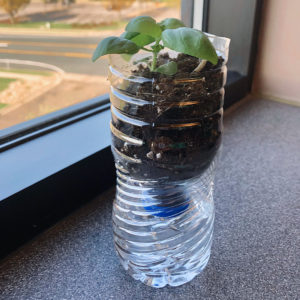
Self-Watering Planter Pot
If you enjoy having plants but dislike watering them regularly, this craft is calling your name. Depending on the size of your bottle, you could have self-watering planter pots for herbs, flowers, vegetables, and more.
Supplies Needed:
- Plastic Bottle
- Plant of Your Choice
- Soil
- 10” of Yarn
- Craft Knife
- Hammer & Nail
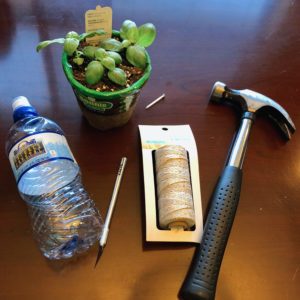
Project Steps:
- Cut the bottle into two half-sections, top and bottom.
- Make a hole in the cap on the top section with a hammer and nail and run the yarn through the hole, leaving five inches on each side.
- Add the soil and plant while holding the string up in the top section.
- Fill the bottom half of the bottle with water.
- Place the top section into the base.
- Water once from the top and then refill the base as needed. The yarn will help the water seep into the soil to create a suitable environment for the plant to grow.
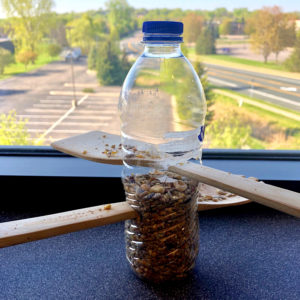
Bird Feeder
Experience the wonders of nature right in your backyard with an affordable DIY bird feeder. Not only do bird feeders positively impact the health of the local wildlife, but it’s also an opportunity to unwind, de-stress, and listen to the relaxing sounds of joyful chirping. Kids can start to identify different bird species and learn about the importance of caring for animals.
Supplies Needed:
- Plastic Bottle
- Two Wooden Spoons
- Permanent Marker
- Craft Knife
- Funnel
- Floral Wire or Twine
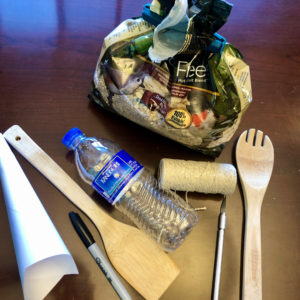
Project Steps:
- With a permanent marker, draw a small circle (the size of the spoon handle) on one side of the bottle about 4” from the bottom. Use a craft knife to cut it out. Directly opposite this hole, cut a slightly larger hole for the curved bowl of the spoon to rest. Repeat this process two inches from the bottom of the bottle, but use the opposite sides of the bottle so that your spoons end up being 90° from each other.
- Fill the bottle with birdseed via a funnel.
- Secure wire or twine around the neck of the bottle to hang the feeder.
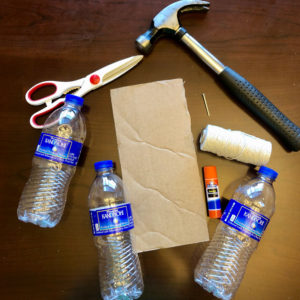
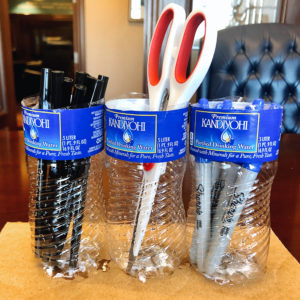
Multi-Purpose Organizer
Find what you need when you need it with a homemade multi-purpose organizer that can hold items from pens and pencils to mail and magazines. These nifty units are handy to have at home, the office, and wherever you need additional storage. Step up your organization game and reuse several plastic water bottles at once. It’s a win-win.
Supplies Needed:
- Plastic Bottles (3–6+)
- Craft Knife
- Glue
- Wooden Board or Cardboard
- Patterned Paper or Labels (Optional)
- Nail
- Hammer
Project Steps:
- If you’re using the organizer for mail or magazines, cut off only the top curved portion of the bottles so that the paper contents can be securely held in place. If you’re using the organizer for pens, pencils, etc., cut the bottles down to your desired length. The bottle should resemble a cup at this point.
- Arrange your bottle cups in your preferred shape (square or rectangle) on a piece of wood board or cardboard that matches the placement. There can be one or multiple rows of cups together.
- If desired, decorate the cups with patterned paper, labels, or any craft supplies of your choice.
- Glue or nail the cups to the wooden board or cardboard.
- Place the board on your desired surface or nail it to the wall for horizontal storage.
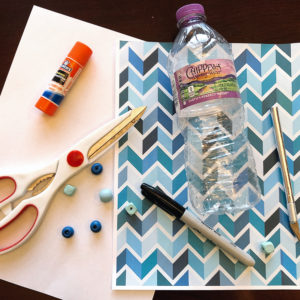
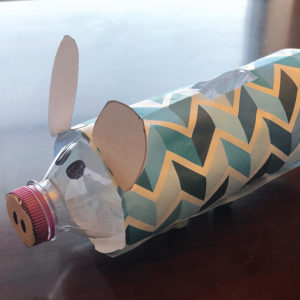
Piggy Bank
Say goodbye to the days of purchasing piggy banks to hold your spare change by making one instead. Teach your kids to save their money in a fun way. If you want your bank to take on the shape of a different animal, the options are endless regarding what you can create.
Supplies Needed:
- Plastic Bottle
- Colored/Patterned Paper
- Googly Eyes or Permanent Marker
- Pipe Cleaner (Optional)
- ½” Beads
- Glue
- Craft Knife
Project Steps:
- Cut out a slit about 2” long and ½” wide alongside the length of the bottle.
- Take a piece of paper and cover the cylinder body of the bottle, leaving the top and bottom sections clear. Remove the access paper covering the slit.
- Cut out two pig ears and one circle that’s the same size as the bottle cap.
- Glue the circle on the bottle cap and the ears on the edge of the paper closest to the “spout.” Stick two googly eyes or draw eyes with a marker on the top section halfway between the cap and the ears. Use the marker to also draw two circles on the cap to act as the nose.
- Turn the bottle over to the bottom side that’s opposite of the slit opening. Glue one bead on each of the four corners so that the bank stands up when flipped.
- If desired, cut a short piece of the pipe cleaner, twist it into a spiral shape, and glue it to the bottom of the bottle to act like the pig’s tail.
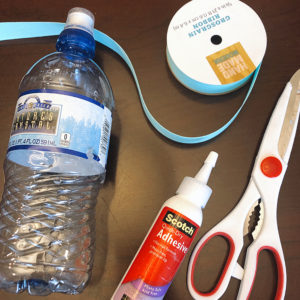
Bracelet
Love to accessorize? Create your own unique bracelets with the colors, patterns, and materials that represent your personality. The best part is…no one else will have the same item! Make numerous bracelets from just one plastic water bottle and stack up your collection. It’s a fun and creative activity that you can proudly display whenever you wear them.
Supplies Needed:
- Plastic Bottle
- Craft Knife or Scissors
- Glue
- Yarn, Ribbon, Fabric, or Tissue Paper Strips
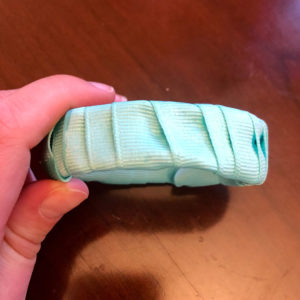
Project Steps:
- Cut a ring of plastic from the body of the bottle that measures 1–3” in width, depending on how large you’d like your bracelet to be.
- Add glue to the surface of the ring in sections and wrap the yarn, fabric, or tissue paper strips around the front and back. Make sure that the edges of the bracelet are entirely covered for maximum comfort.
- If you are using tissue paper strips, make sure to add a coat of clear glue on the entire bracelet, let it dry, and repeat until you achieve a shiny finish.
The next time you’re looking for a fun and creative activity to do at home, keep these easy DIY crafts with plastic water bottles in mind. Reuse what you have and transform these versatile vessels into objects you’ll enjoy time and time again!